FG Governors Repair Reporting
Information Architecture – Interaction Design – Wireframes – Prototypes – User Testing
The problem we were solving
This sprint, part of a long-term project, was about building a user interface for the mechanical engineers so they could enter all relevant data when performing governor repairs and maintenance in the shop.
This portfolio project will focus on the interview part of the sprint and more specifically the thematic analysis after conducting the interviews.
“You cannot understand good design if you do not understand people; design is made for people”
– Dieter Rams
The User Interview
Interviews help you gain an understanding of people’s behavior and the reasons why they do what they do. To make the most of your interviews, you should prepare yourself before each one. Having a plan for your interview will make it go much smoother, leave a positive experience for your user and make sure you will cover all the important areas.
You can prepare for an interview by:
- Set a clear goal for the interview.
- Brainstorm the questions with your team.
- Group these questions into themes.
- Have a practice run with a team member.
The interview itself should have a clear structure:
- Start with some opening questions to set people at ease and build rapport.
- Shift gears and ask the bulk of your questions aiming for your set goal.
- Wrap the interview up in such a way the participant feels he has given valuable answers.
I will devote a couple of blogposts on interview techniques in the future. I am often surprised when being interviewed, how many people come unprepared. They seem to forget that, as a seasoned designer, I have both interview skills, and a BS meter…
Thematic Analysis Overview
“Analysis involves a constant moving back and forward between the entire data set, the coded extracts of data that you are analyzing, and the analysis of the data you are producing.”
– Virginia Braun and Victoria Clarke
Thematic analysis describes an iterative process as to how to go from messy data to a map of the most important themes in that data. The process has six steps:
- Familiarize yourself with your data.
- Assign preliminary codes to your data which describe the content.
- Search for patterns and themes in your codes.
- Review these patterns.
- Define and name themes.
- Produce the report of your analysis.
Let’s look at each of these steps closer, with regards the interviews we did with the engineers of FG Governors.
Familiarization
To focus on the interview completely, it is a good idea to record your interview in some way. The first thing to do is to create transcripts of these recordings. How much you need to transcribe depends on the goal you have set. You may need to transcribe everything that was said, but if you were looking for specific topics only, you can just transcribe those parts.
I like to do my own transcriptions. That way I get familiar with the texts quicker and with less study. But you could outsource this of course.
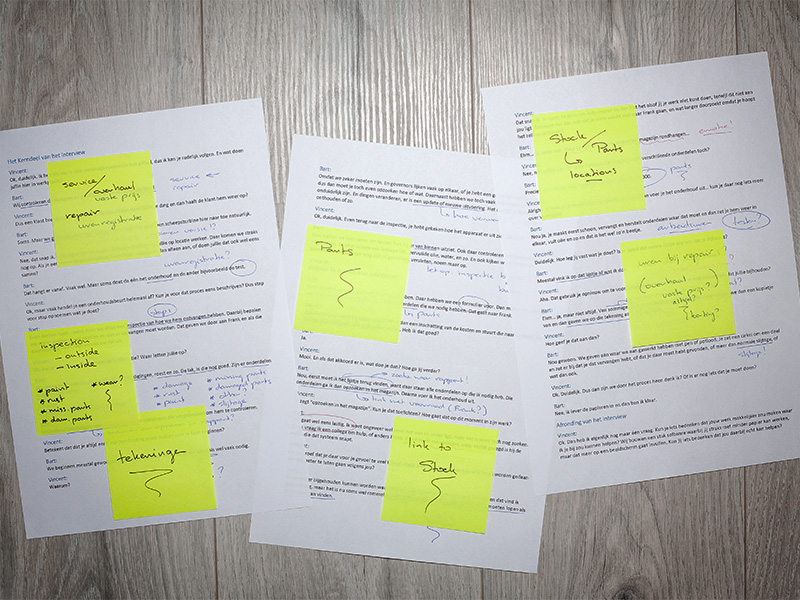
Next we start to make notes about what was said and start marking your first ideas for codes that describe the content.
This phase is all about getting to know your interview data.
Generating Initial Codes
Skimming over our notes we start to look for interesting bits and pieces.
Remember, this was not the first sprint. We had been working on this system for quite a while and were familiar with it. What we were looking for here, was how to connect the workshop with the office, so to speak. We knew at high level what we were looking for, so one of the main goals of interviewing the engineers was to come up with familiar labels and microcopy for them.
Interesting things that surfaced were:
- They actually did three inspections on a governor:
– outside as received,
– inside as received,
– general after inspection. - Their work was mainly linked to parts and stock.
- They administered their hours themselves.
- They used a “shop copy” of the governor’s drawing for notes.
We needed to facilitate all this (and more) in their shop-interface.
Searching for Themes
Where the codes identify bits of information in your data that are of interest, themes are broader and cover multiple codes.
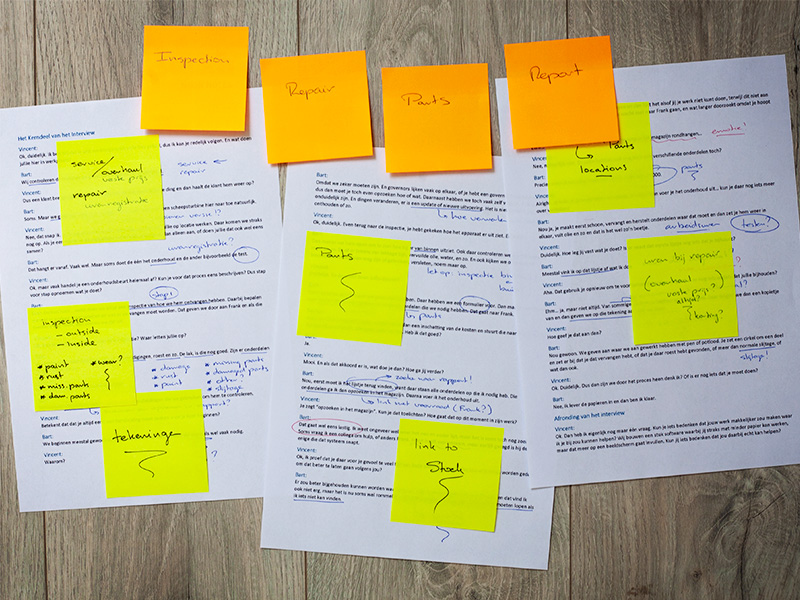
We started by looking at our list of codes and tried to group them in broader patterns. This is best done in an iterative process and we moved codes back and forth trying to form different themes. In the end you aim for as few themes as possible; of course in relation to the complexity of your data.
In the case of FG Governors we came up with the following themes, we needed to consider for the interface:
- Inspection – done at several moments in the process, recurrences are always good themes.
- Repair – the actual purpose of the exercise.
- Parts – again, at several moment in the process, machine parts play a, well, ehhh, part.
- Report – the administrative bit, both for FG Governors use as well as the customer.
We decided to put “overhaul” under the umbrella of “repair”, as the only difference between the two was the way they were charged to the customer. The other activities were similar.
We now had our main points of focus clearly in sight.
Reviewing Themes
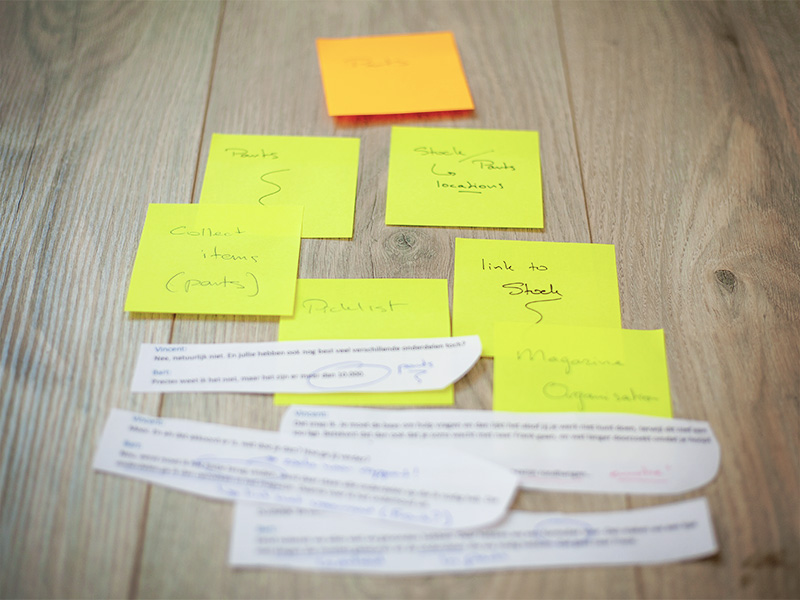
Here we reviewed and refined our themes. We tear up our transcripts and group them with their theme and its codes.
- Does everything support one another?
- Are there contradictions within a theme, if so, can we improve this by splitting it up?
- Are there themes that overlap, if so, can we merge them?
- Rinse and repeat…
We kept doing this until we had a set of themes that were coherent and distinctive.
Of course we presented the result to a couple of our engineers and did a card sorting exercise with them. This verified our chain of thought, allowed us to adjust where needed and gave us confidence to move on.
Defining and Naming Themes
The fifth phase is about labeling, or naming, your themes.
“Define the essence that each theme is about”
– Braun and Clarke
In this case, with FG Governors as the single user group to consider, we made sure the names we picked were familiar within the company and matched the expectations of the engineers. Not only did we do another card sorting exercise, we also encouraged active contribution.
Delivering Our Report
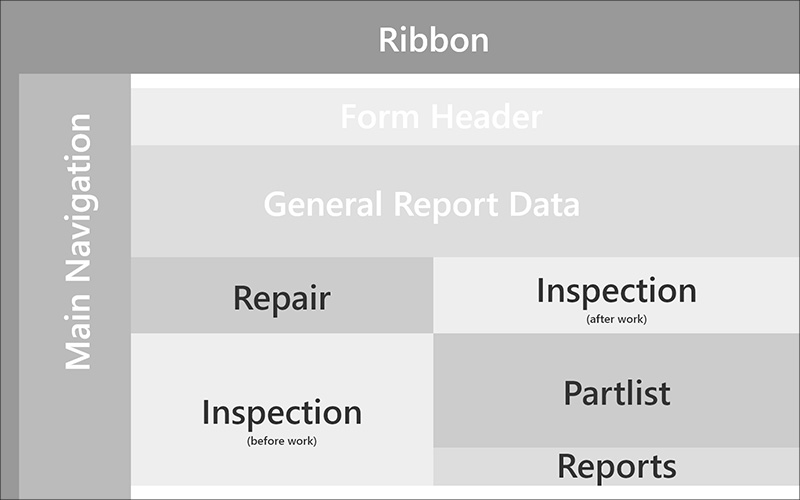
Besides a written report, our most important deliverable here was a wireframe of the screen layout for this section of the application.
Initially we wanted to make a layout using tabs, but the engineers asked us to put everything in one screen. They were not afraid of information overload and rather had everything visible, so they did not have to click around. As always, using best practices only will get you so far with a specialist crowd.
You can clearly see the major themes marked in the wireframe with black text. The areas marked with white text are the real estate used for system functionality or general application real-estate.
Iterations for More Detail
From here on, we started to work towards our representational model, iterating in more detail.
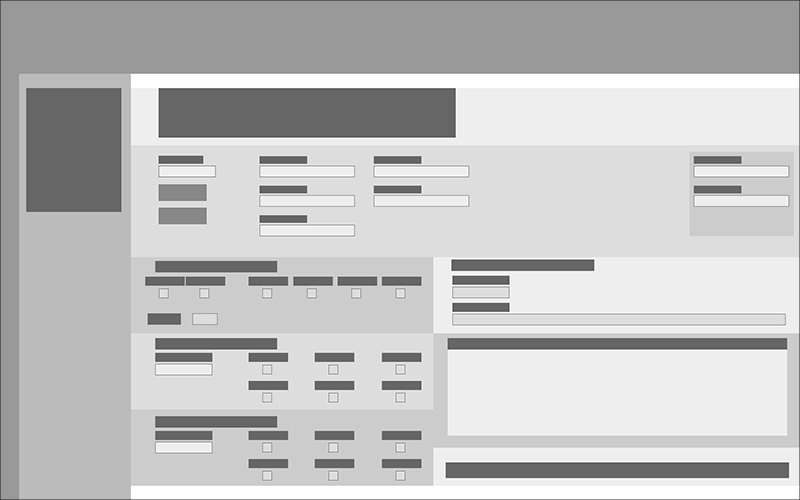
First we made a wireframe that showed all areas, so we could check if there were any sizing issues. In the next version we added text fields, check boxes, etc.
It is very important to do this work step-by-step and talk with both stakeholders and users along the way. When more detail is added, the conversation is about that particular detail, and not about something else. This means meetings remain short, quick, with participants who are focused and on-topic.
The Prototype
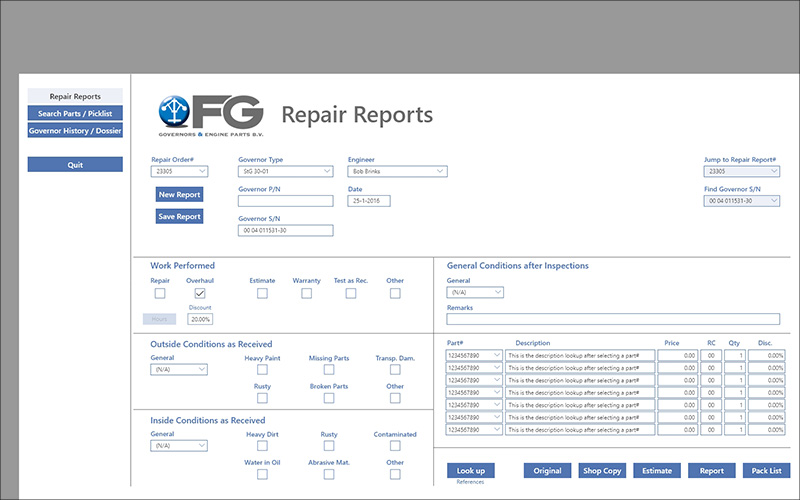
For completeness sake I have included a version of the prototype that would be drawn after this sprint. And I have to agree with the engineers, this screen is not too busy, there is no information overload and there was no need for the tabular design pattern.
This beautiful, and above all practical, screen lay-out was the result of careful analysis of interviews with the people who had the most to gain by a good design. The engineers who have to work with this part of the application every day.


